
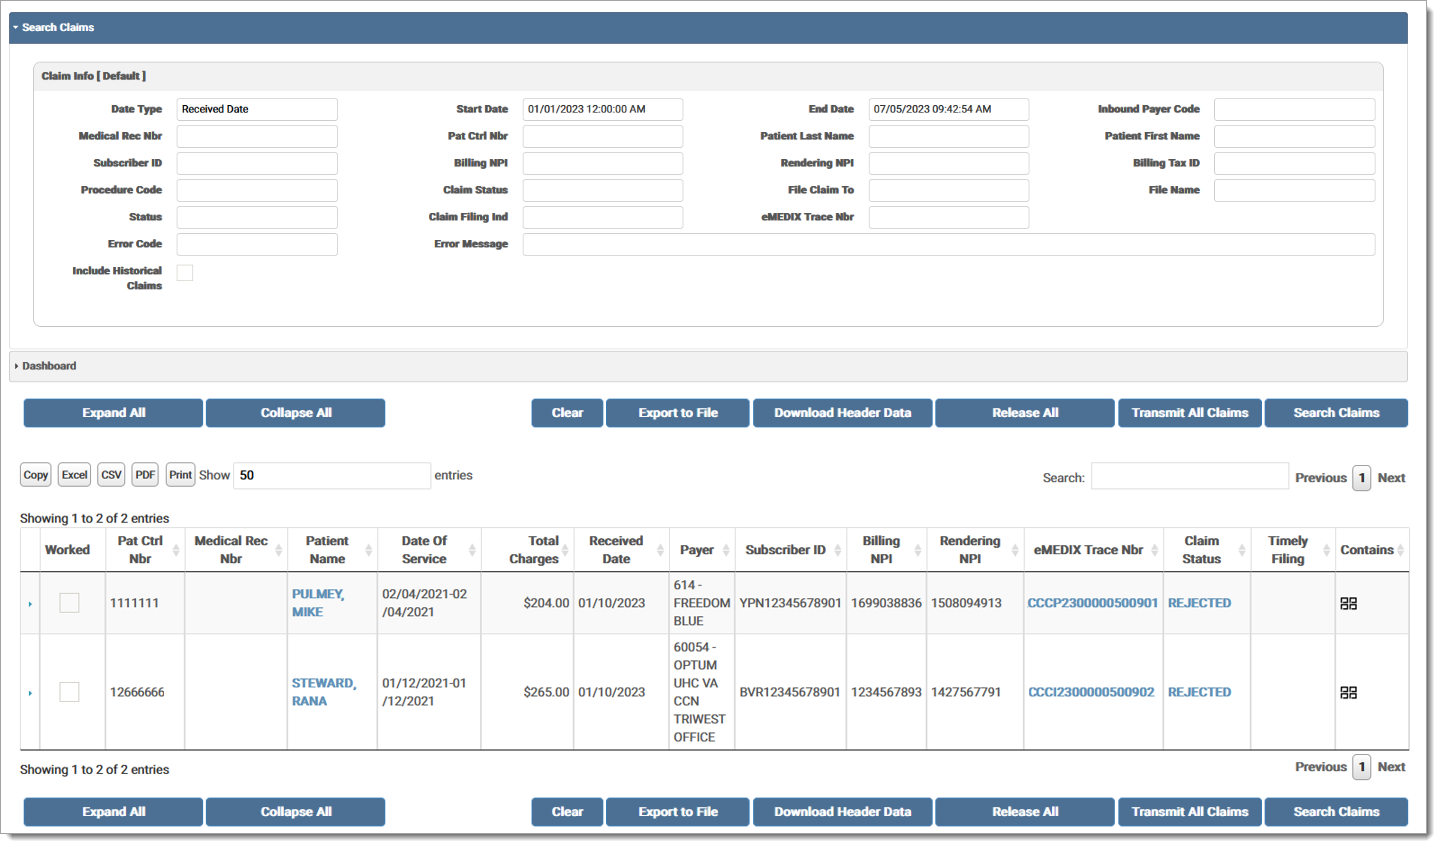
The Workspace includes search options and a results grid. Users may search by Date Range (Dates of Service or Received Date), Inbound Payer Code, Medical Record Number, Patient Control Number, Patient Name, Subscriber ID, Billing/Rendering Provider NPI, Billing Tax ID, Procedure Code, Claim Status, File Claim To, File Name, Status, Claim Filing Indicator, eMEDIX Trace Number, Remit Matched, Error Code and/or Message, and Worked/Not Worked. At least one field is required for a search. Icons in the Contains column of the grid indicate which option is available for that claim. Users can search for a group of claims and transmit all in that group at once. A record is added to the Audit Log for activity in Claims Connection.
The Search Claims and Dashboard options are accordion banners. Click the banner to display the associated fields. Users can toggle the banner to minimize/maximize that section on the screen. Users can also set a banner as the default view.
Users must have appropriate permissions to view denials in Revenue Resolve. Permissions are required for other functionality within the module, such as viewing claims. Please contact eMEDIX Support to get set up.
Once the search results display in the grid, the user can click on a claim to display all the details. The Contains column displays icons that indicate which options are available for a claim. Icons only display in the grid when that option is available for the claim. Options include:
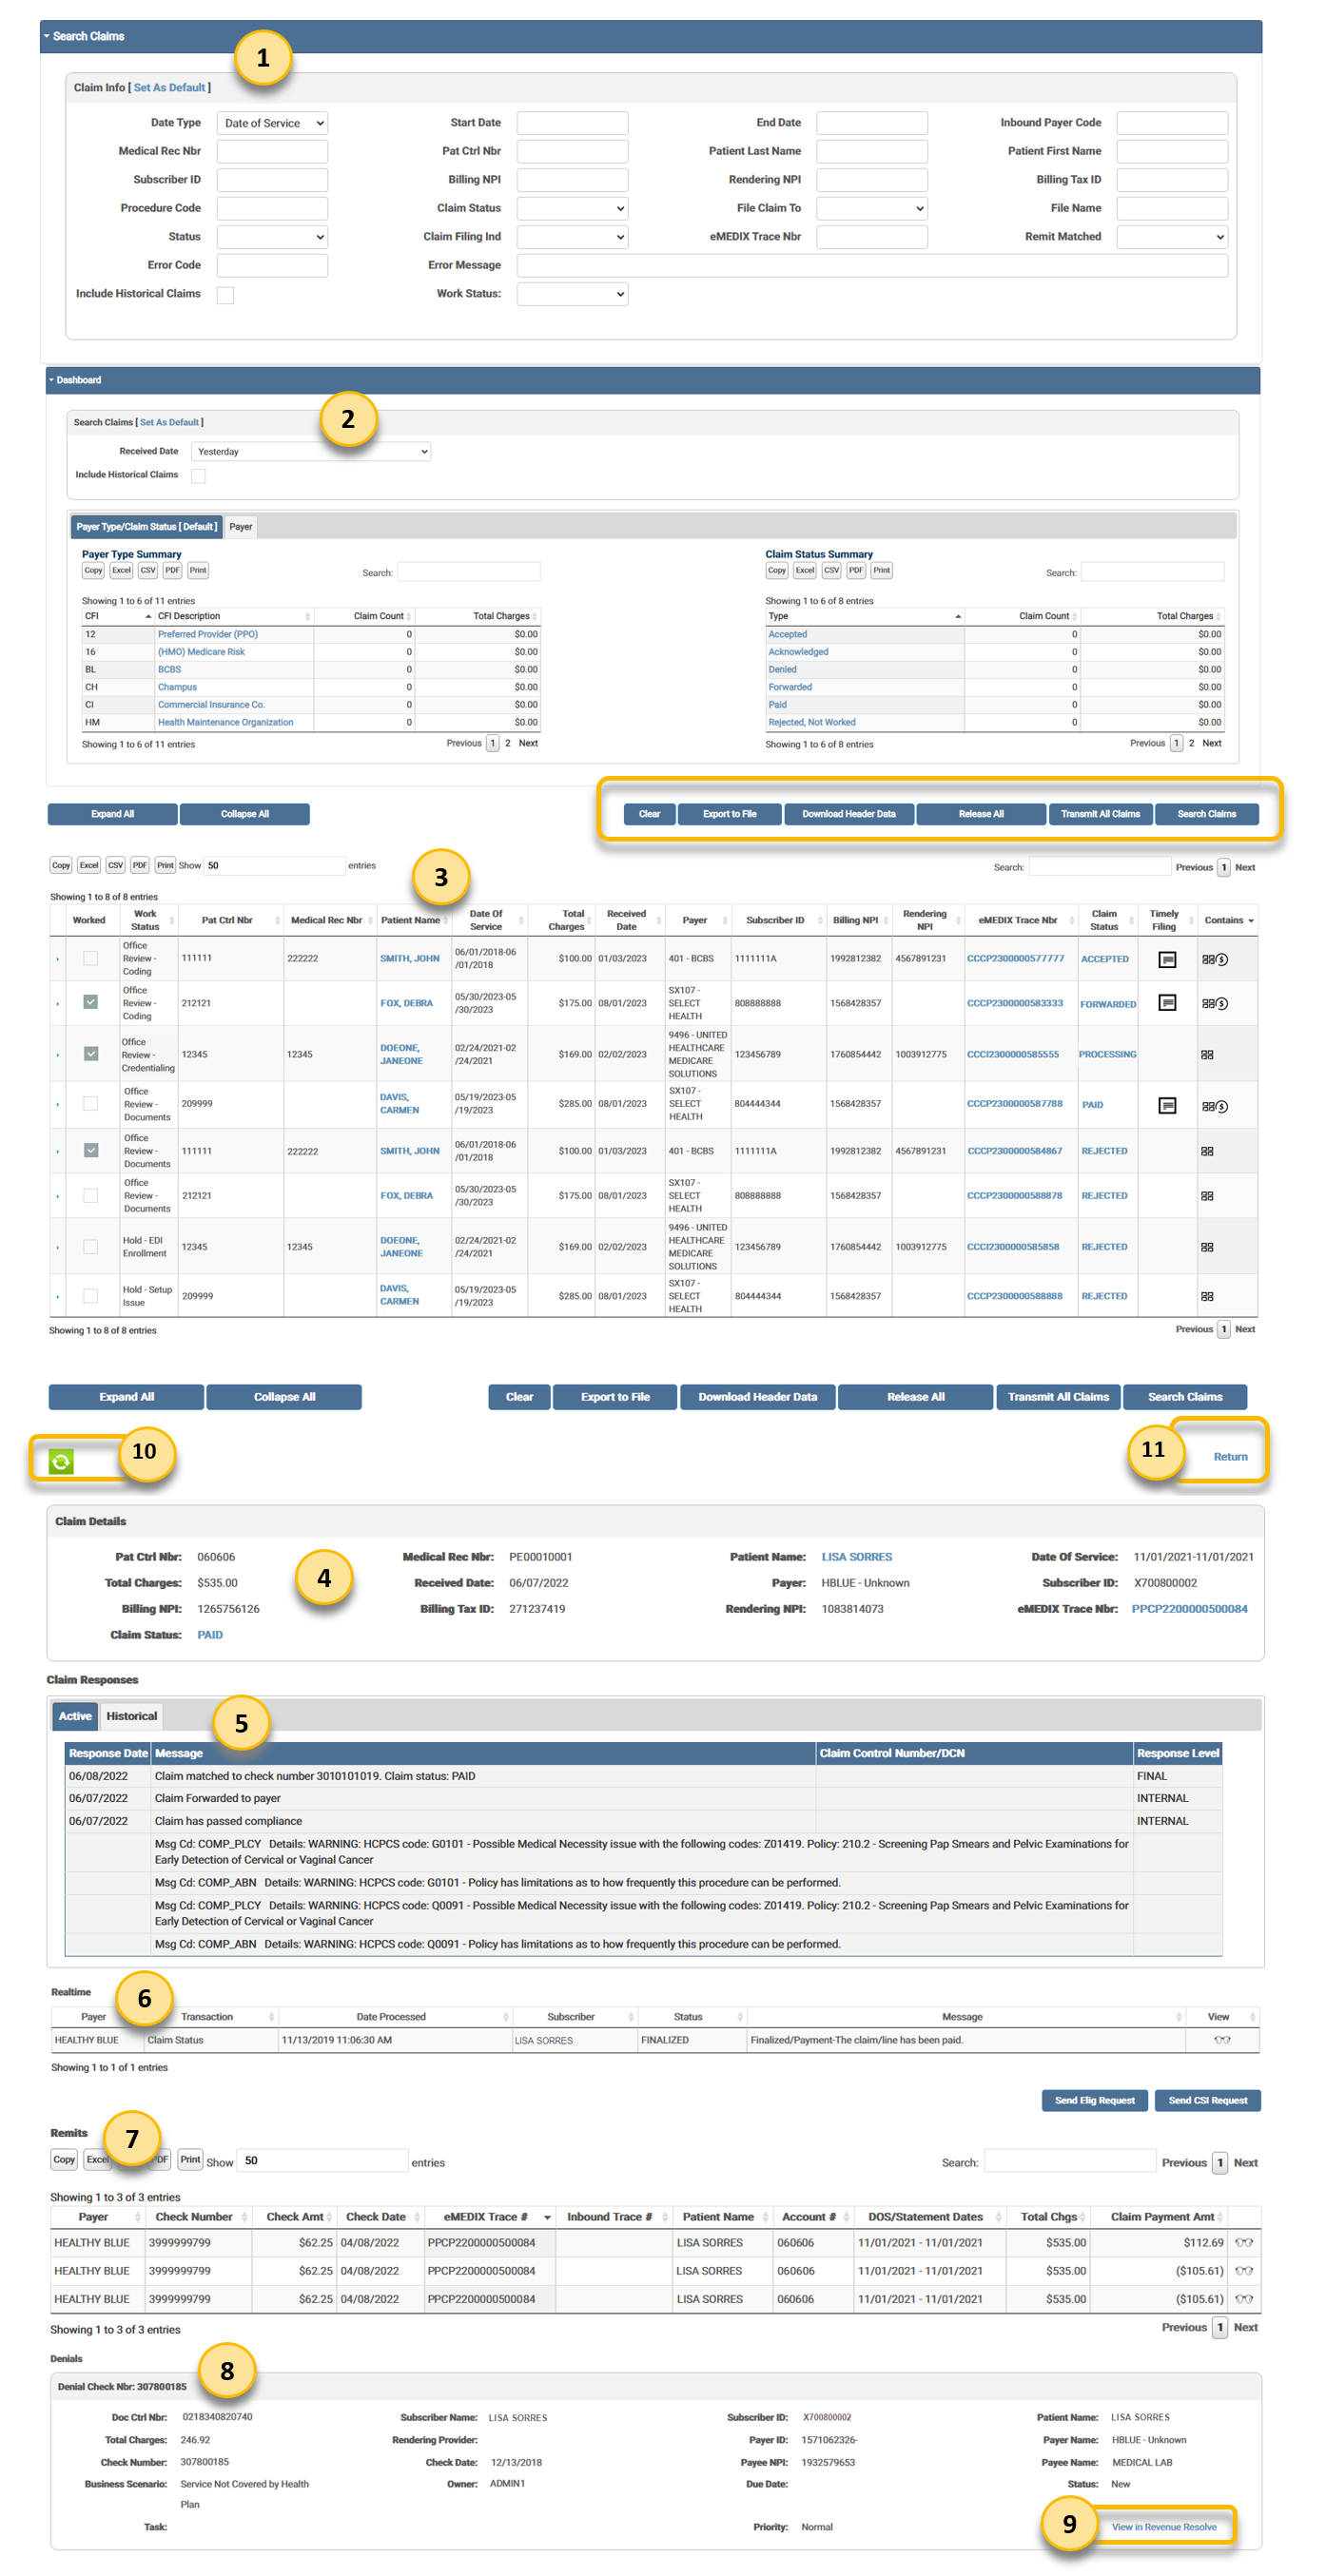
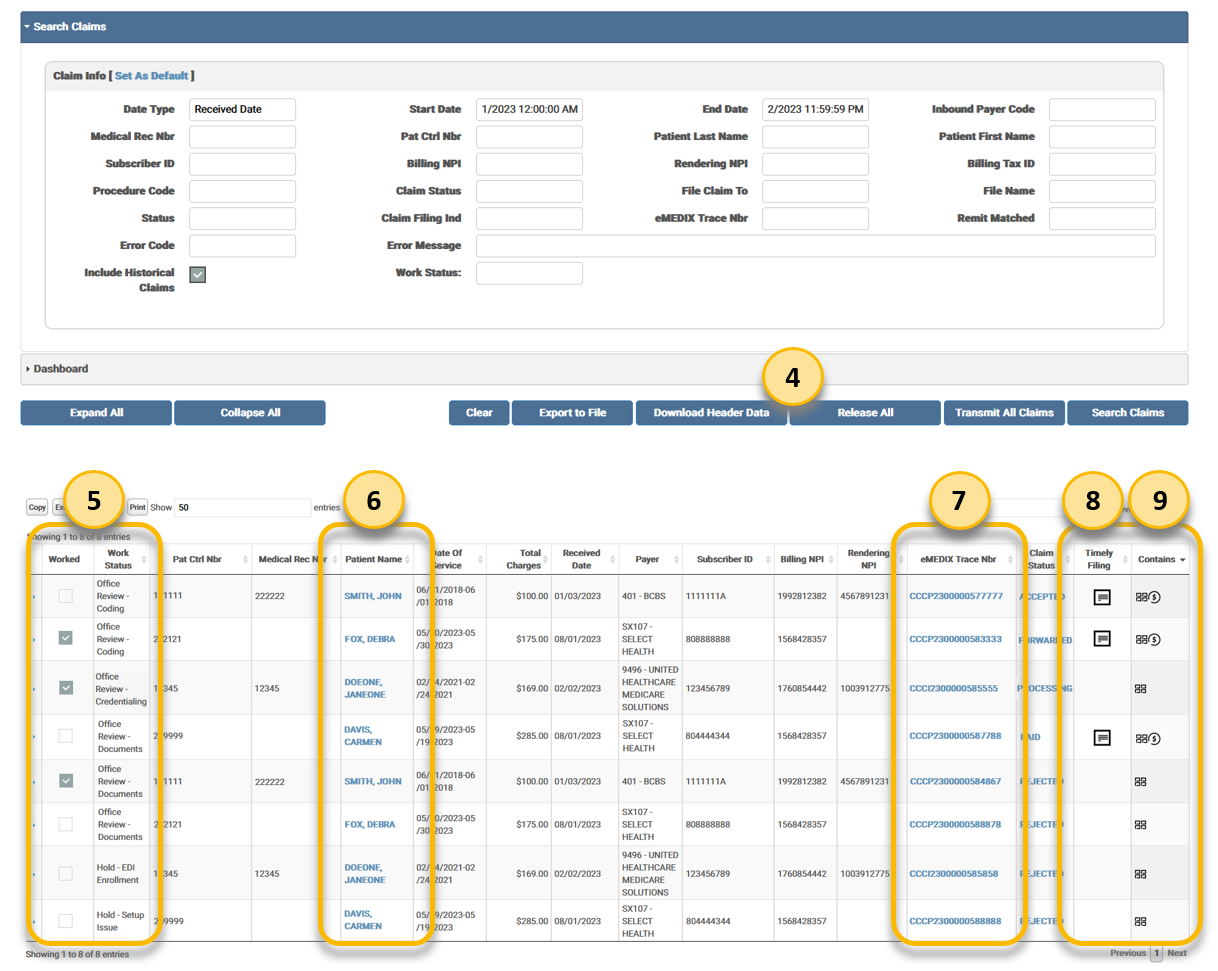
Claim Search: Enter search criteria and click Search Claims to view search results. At least one field is required for a search. The Assigned User drop-down option is only available for Admin users. Default indicates this is the default view and the Search Claims section displays first when set as default. Users can search for claims using error codes and/or error messages, including special characters. Mark Include Historical Claims to display each iteration of the claim submitted to the payer.
Dashboard: Search claims by date and review the Payer Type Summary for claim count and total charges per claim filing indicator (CFI) or the File Summary for claim count and total charges per claim status type. Click the desired label to view the claims for that payer or status detail. Click Set As Default to change the default setting to Dashboard. Mark Include Historical Claims to display each iteration of the claim submitted to the payer.
Search grid: Search results display in this grid. Click desired claim to view the available information. An Assigned Users column displays in the grid for Admin users. Click Export to File to export claims directly from Claims Connection. Click Release All to bypass eMEDIX edits and send claims directly to the payer. Click Transmit All Claims to re-run claims through eMEDIX edits and transmit to payer. Click Download Header Data to download claim header data from the search results. Click the arrow to drill-down for more claim information.
Claim Details Recap: Displays all the claim details for the selected claim.
Claim Responses: Displays the claim response details.The Claims Responses section includes two (2) tabs for Active (current) and Historical (previous) responses. The Historical responses are no longer applicable but provide a response trail for users to view when needed. Click the appropriate tab to view the desired response.
Realtime: Displays the on-demand claim status inquiry (CSI) and eligibility details and allows the user to send a CSI and/or Eligibility request.
Remits: Displays the remit details in the grid. Click the eyeglasses icon to view a human-readable remit.
Denials: Displays the claim denial details.
View in Revenue Resolve: Click to display the Account Details tab in Revenue Resolve for the denial. Click Return in Revenue Resolve to return to the Claims Connection screen.
Refresh: Click to refresh the individual claim.
Return: Click to return to the search results grid.
The buttons below the accordion sections perform actions appropriate to the active accordion section.
![]()
To search for transactions:

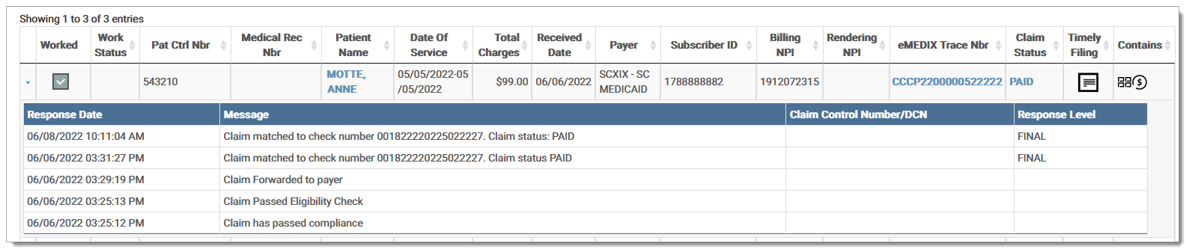
Remit Matched allows users to select Yes or No from the drop-down menu to search for claims with or without matched remits. Once selected, only remits matching the menu selection display in the search grid. The following example displays a search for matched remits.

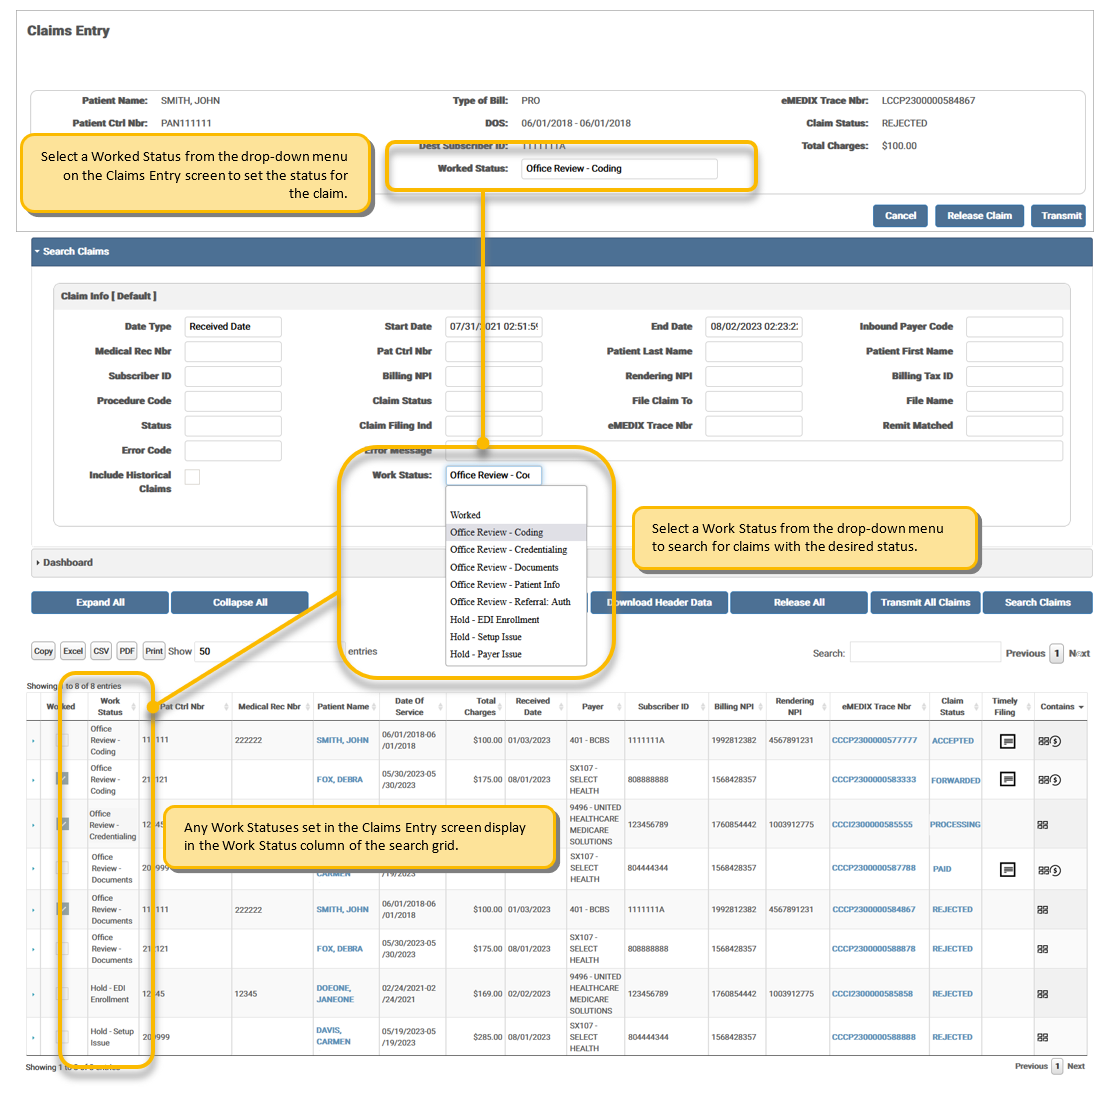
Work Status is a drop-down menu that allows users to search for claims with a specified work status, which displays in the search grid. The Work Status is set for the claim on the Claims Entry screen. Options include:
Admin users can search by assigned user if using load balance. If this is not set up, the assigned user feature is disabled. To search for transactions:
In the Search Claims section, select the desired user from the Assigned User drop-down menu.
Enter any other known claim information in the search fields and click Search Claims. 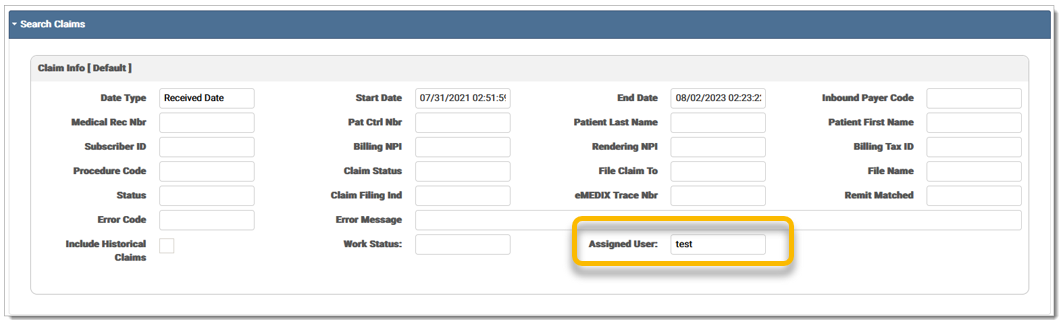
The search results are displayed in the grid with the Assigned User column visible to the admin user. 
Users can override claim edits and release claims in bulk using the Release All button. Release All bypasses eMEDIX edits and sends claims directly to the payer. Users can search for claims in error that contain a specific code and/or message and then click Release All. This action releases all Rejected claims in the results grid. A confirmation message displays indicating the claims will be released and prompts the user to select Yes or No to continue. Historical claims are not included in the bulk release.
To release a group of claims at once:
Enter any known claim information in the search fields, such as the Error Code and/or Error Message, and click Search Claims. The Release All button is disabled until a search is complete.

The search results display in the search grid. The Release All button is activated.
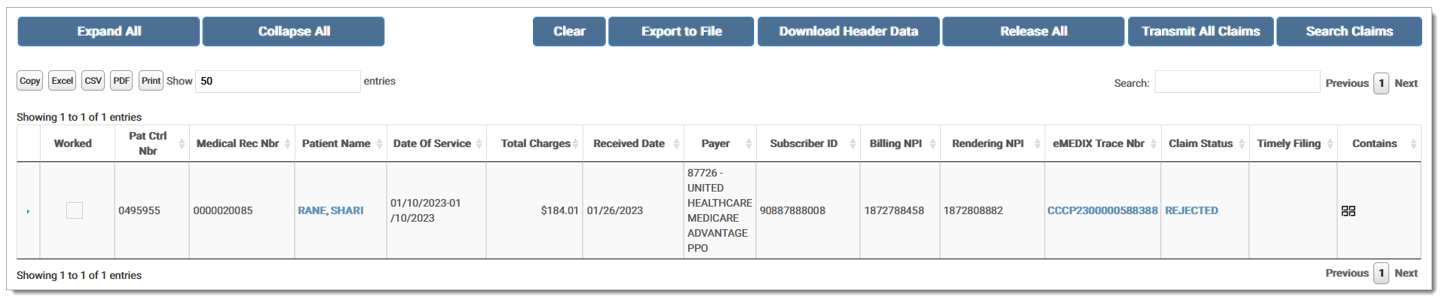
Click Release All to release all claims in Rejected status.
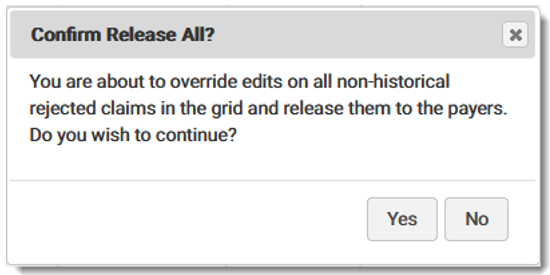
A confirmation message displays stating the user is going to override edits on all non-historical rejected claims in the grid and release them to the payers. Click Yes to continue or No to go back to the Workspace.
If yes is selected, a success message displays stating the selected number of claims were released.

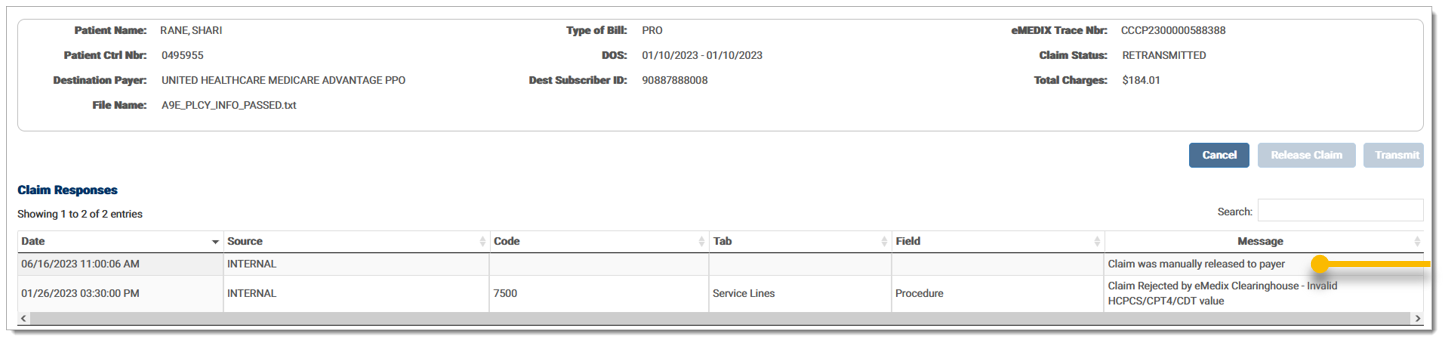
A message is added to the Claim Responses indicating the claim was manually released to the payer.
Claims cannot be released if a provider is not active. An error message displays stating the "Provider is not currently active for your account. Please check Provider Setup in eMEDIXOnline. If you are currently at or over your provider count limit, please contact Support."
Users are able to search for a group of claims and transmit all rejected claims in that group at once. This allows the user to retransmit claims without making corrections to each individual claim. Only claims in Rejected status can be retransmitted.
To transmit a group of claims at once:
Enter any known claim information in the search fields and click Search Claims.The Transmit All Claims button is disabled until a search is complete.
The search results display in the search grid. At this point, users can filter the results in the grid, if necessary.
Click Transmit All Claims to transmit the claims in Rejected status. If a filter was used, only the Rejected claims in the filter will retransmit. If no filter is used, all Rejected claims returned in the search retransmit.
A confirmation message displays stating All rejected claims in the grid will be retransmitted. Click OK.
![]()
A success message displays stating the selected claims were retransmitted.
![]()
The Rejected claims that were retransmitted are now in Processing status. The original claim is marked as Retransmitted.
eMEDIX Online | ©copyright 2025 CompuGroup Medical, Inc. All rights reserved.