
Users may update all claims all at one time for Status, User, Priority, Task, Due Date, and/or Business Scenario. The Business Scenario option is only available for Unspecified. All other Business Scenario options are disabled. The claims must be within an active filter from selecting a link in the Dashboard, or from a search in the Workspace.
To update all claims:
From the Workspace, select the desired filter(s) from the Search Criteria and click Search. The Update All button is activated.
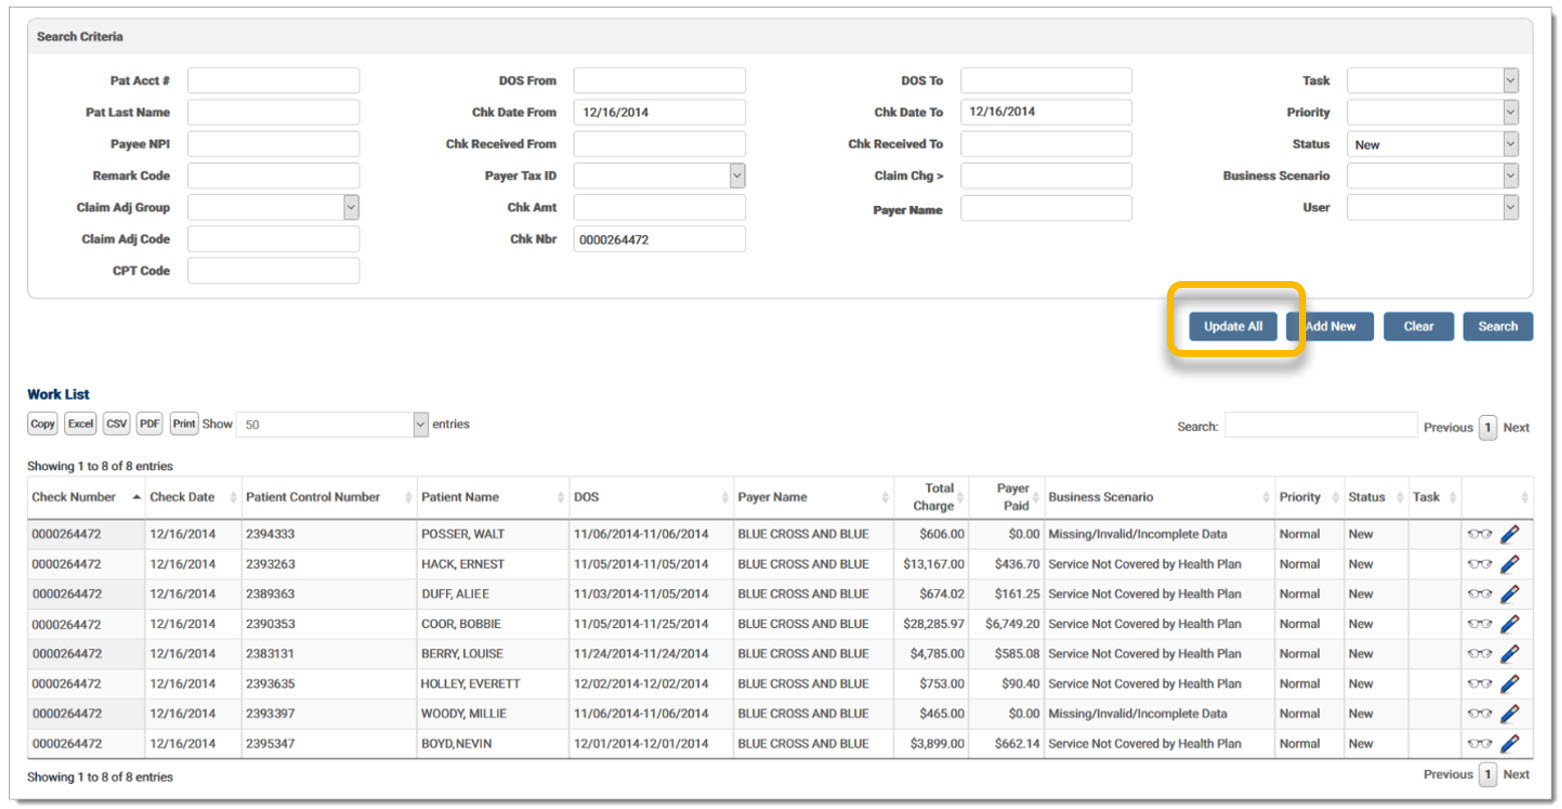
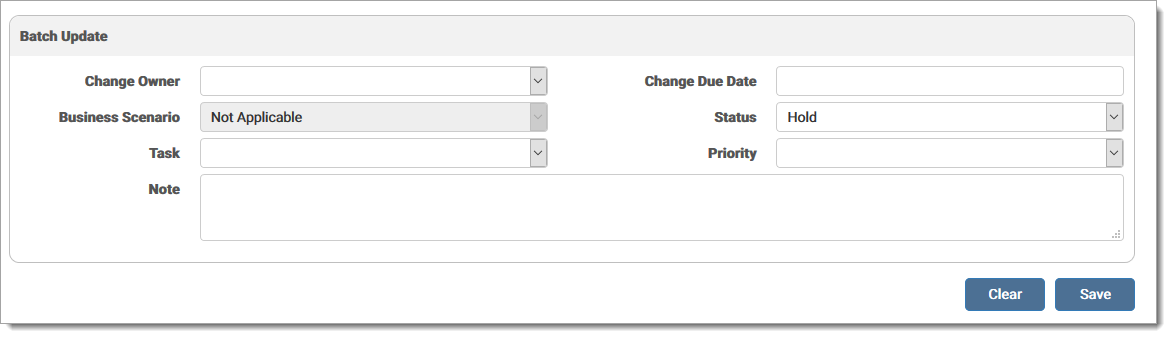
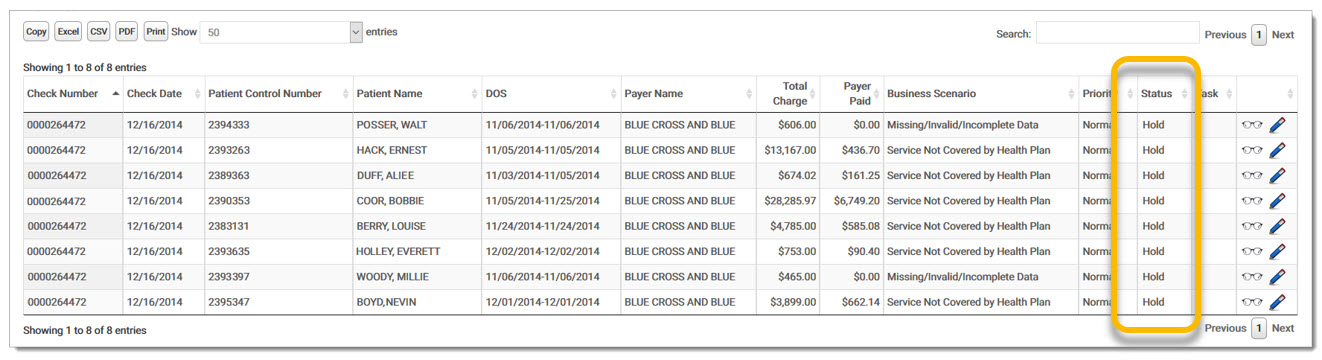
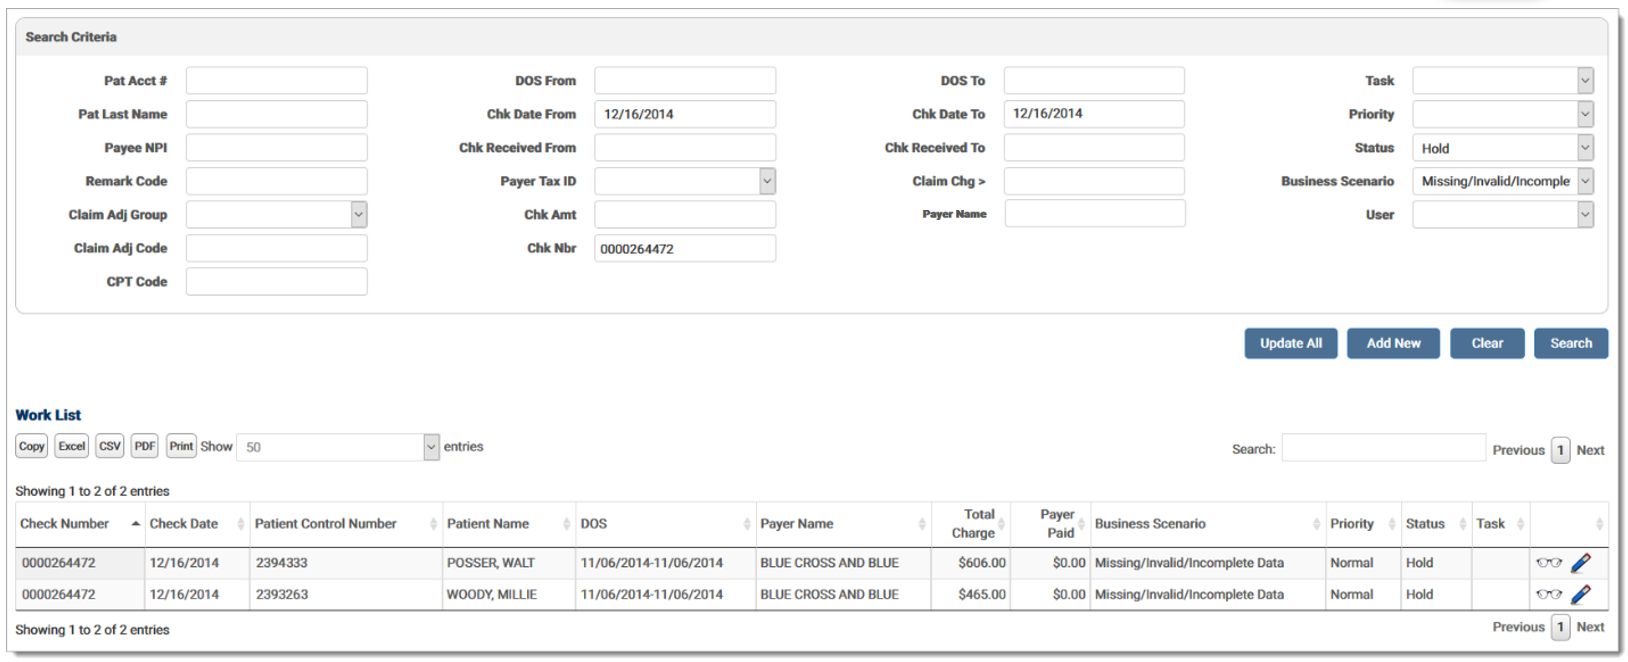
Click Update All. An Update grid displays below the Search Criteria with the available update options. Make the necessary changes and click Save. Once the update is saved, if the changes are different from the filter, the list of denials in the grid may change. For example, if the active filter is New and the status is updated to In Progress, then all the denials will disappear from the grid. Clear the filter to start a new search.
The Work List grid displays the updated information and indicates the records were successfully updated.
Note:
The Update All command for Business Scenario and Closed claims cannot be undone. Be sure the update is correct before clicking the Save button.
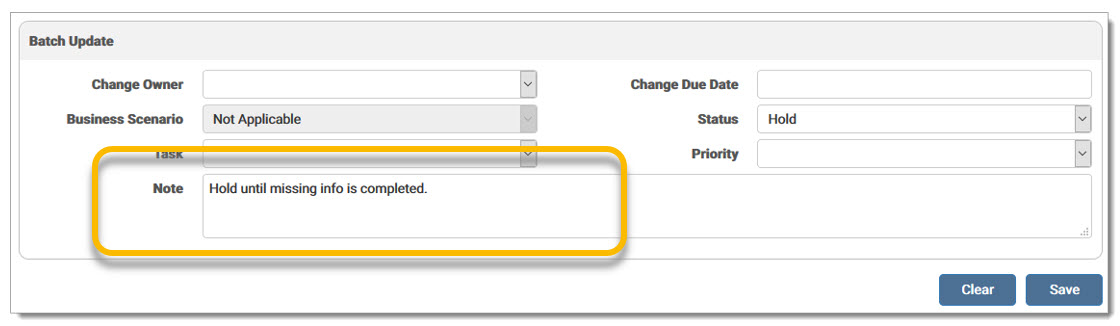
Users may add a note to all claims selected in Update All. Once a note is entered, it is added to all claims in the filtered search.
To add a note:
From the Workspace, select the desired filter(s) from the Search Criteria and click Search. The Update All button is activated.
Click Update All. The Update grid displays below the Search Criteria. Add the desired note in the Note field and click Save. A message displays stating the record(s) updated successfully.
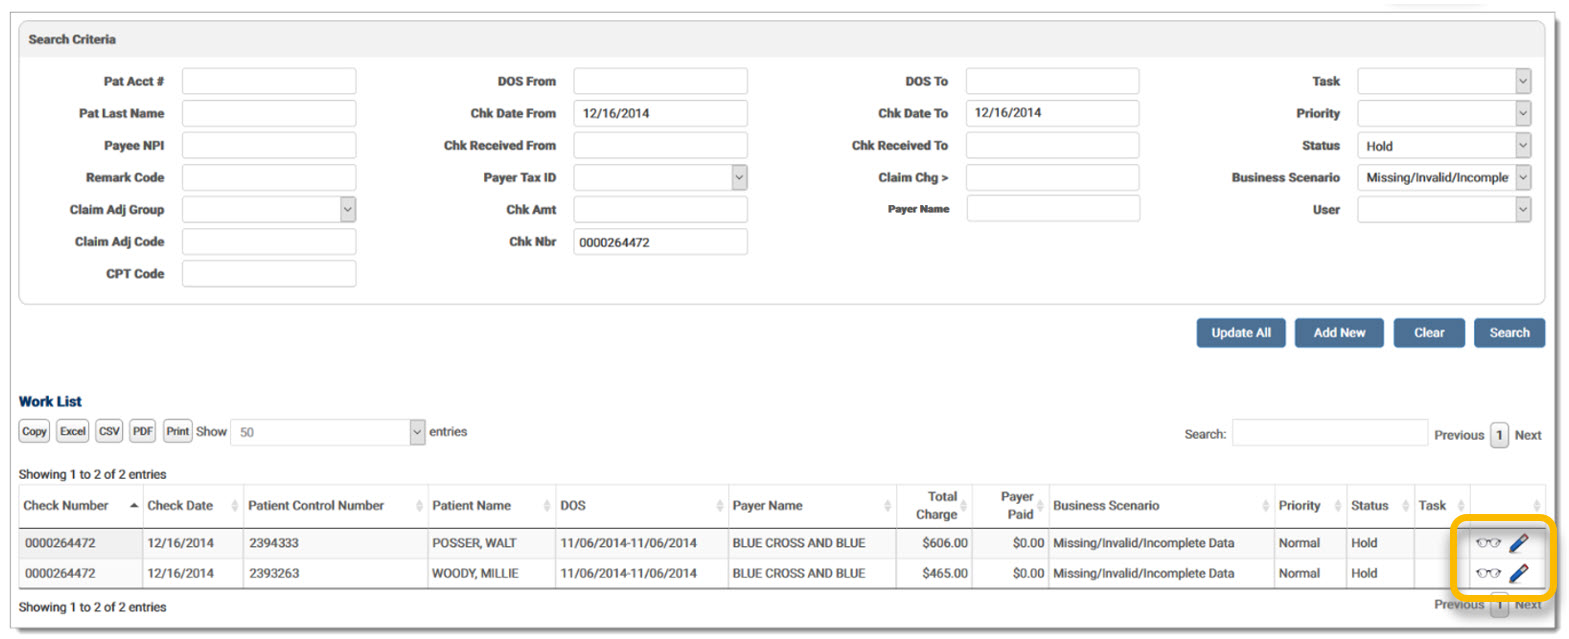
Complete a search with the updated criteria to view the remits in the Work List. Click the pencil icon.
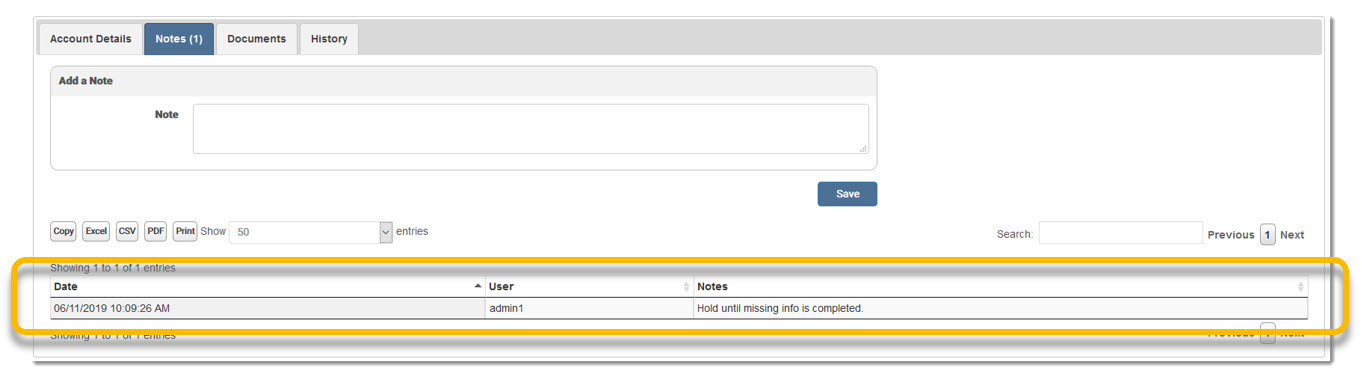
Click the Notes tab of the Account Details screen. The number on the tab indicates the number of notes associated with this remit. The notes displays in the grid at the bottom of the tab. See the Notes Tab section for more information on adding notes to a remit.
A record is added to the Audit Log for the activity. Users may search for Revenue Resolve Update All to view the activity report.
eMEDIX Online | ©copyright CompuGroup Medical, Inc. All rights reserved.