
The Attachments section allows the user to add and view attachments to a claim and submit to a payer. The Attachments tab is only visible to users with the Claims Connection Attachment User permission and the site must be contracted for Attachments. Additionally, this tab is only visible if the payer accepts electronic or print/mail attachments. To verify whether a payer accepts attachments, please consult the eMEDIX Payer List under the Administration menu in eMEDIX Online or by using the following URL link: https://online.emedixus.com/payer-list.
Attachments submissions take two types: Solicited and Unsolicited. For example, a worker's compensation claim would include an unsolicited attachment illustrating the conditions pertaining to the claim, as required in all worker's compensation claims. Solicited claims usually are sent by payers to providers requesting documentation for a claim. Users are unable to send both a solicited and unsolicited attachment on a claim; it must be one or the other.
An attachment is an electronic rendition of medical documentation, such as an X-ray, lab report, or questionnaire, to support a healthcare administrative transaction. The following formats are accepted for attachments: JPG, BMP, GIF, TIF, TIFF, PDF, DOC, DOCX, TXT, RTF, JPEG, and PNG.
In claim submissions, users have the option to send solicited and unsolicited attachments; however, please note that these should be submitted in separate transactions. While both types of attachments can be sent electronically, combining them in a single transaction is not permitted.
To manage claims that include a claim filing indicator of WC or AM and have the PWK segments for paperwork but lack an accompanying attachment, utilize the HOLD ADDL INFO REQUIRED status. This status ensures that claims are efficiently held in the system until the necessary attachment is provided.
To upload and send an attachment:
Click the Attachments tab.
If the Billing Provider phone number and fax number is present on the claim (Billing Provider/Pay-To tab), it is automatically populated on the screen. If it is not already populated, users can enter the information. If the payer address is provided on the 837, it is pre-populated from the Subscriber/Payer tab. The field is editable if the user needs to update the address. This is the location where the Attachment will be sent. 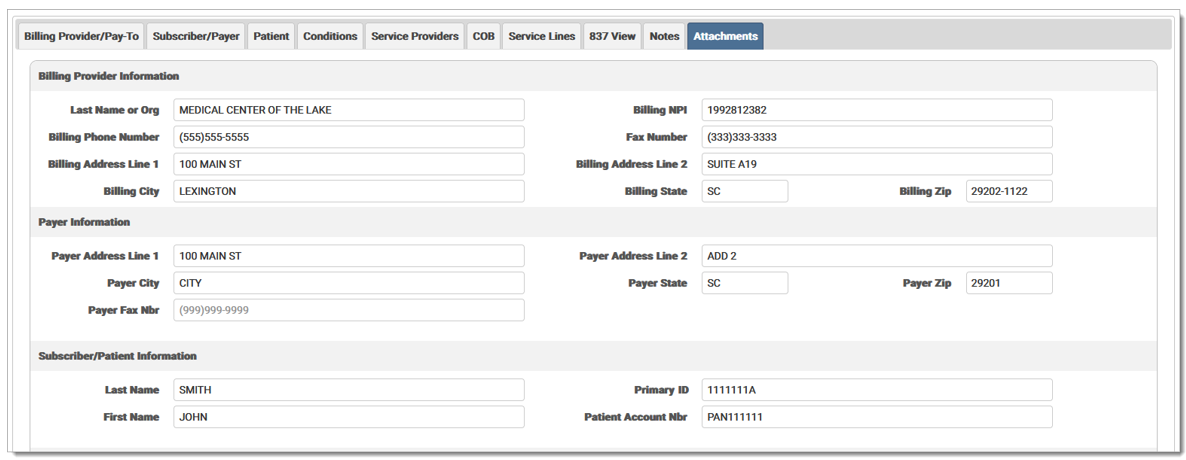
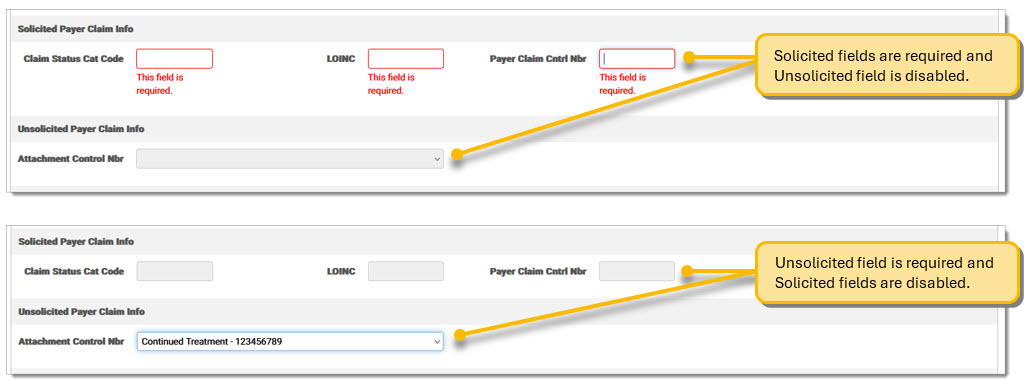
If a claim is Solicited, enter the required information in the three (3) Solicited Payer Claim Info fields. If the attachment should be sent with a specific service line, mark the check box in the Select column of the Service Line information. Please note only one service line can be selected at a time. Additionally, the Attachment Control Number field is disabled for solicited claims, as it is intended for unsolicited attachments. 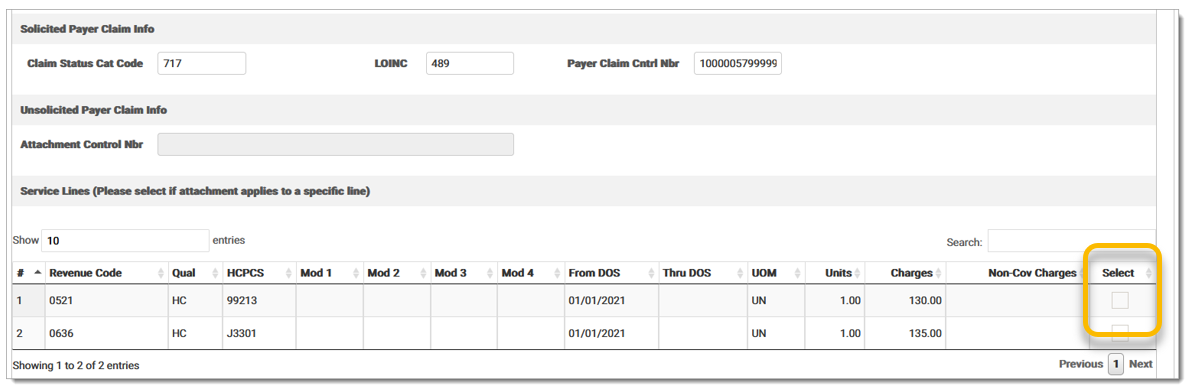
If a claim is Unsolicited, select the Attachment Control Number information from the drop-down menu. The information in this menu is automatically populated and can be viewed in the 837 View tab, if present on the claim. Note: Either Payer Claim Control Number or Attachment Control Number is required to submit an attachment. If not present, an error message displays to prevent submission of the attachment. 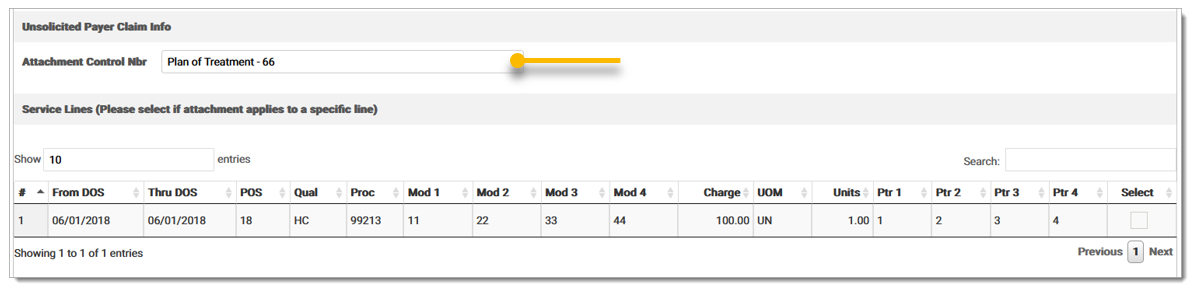
The PWK06 must also be present to send Unsolicited Attachments. For Professional claims, the field is on the Conditions tab, under Chiropractic/Contract/File Information, and in the File Information section. Enter the PWK06 in the Attachment Ctrl Nbr field(s).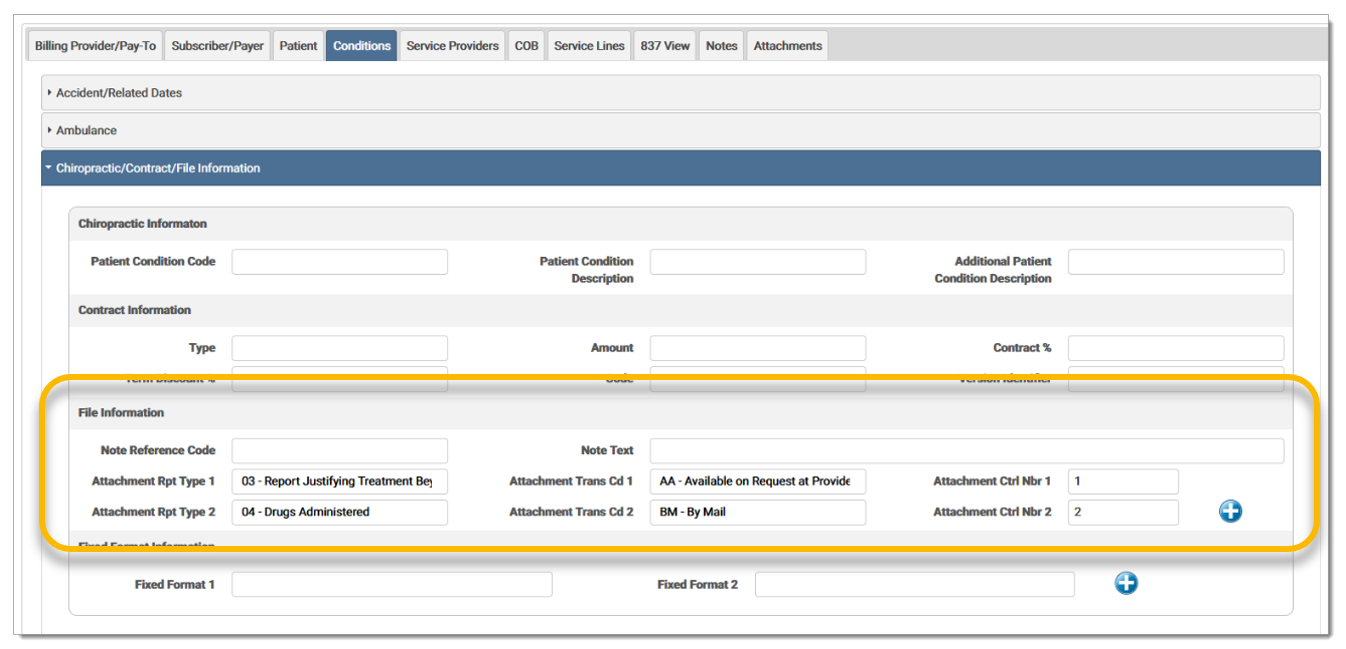
Click the Upload box to select a file or use the drag and drop feature to move a file for upload. The Submit Attachment button is disabled until an attachment is uploaded. 
The uploaded file displays in the upload box. Click Submit Attachment to attach the file to the claim. Click Remove File to remove a file before submitting. A successful message displays once successfully submitted. 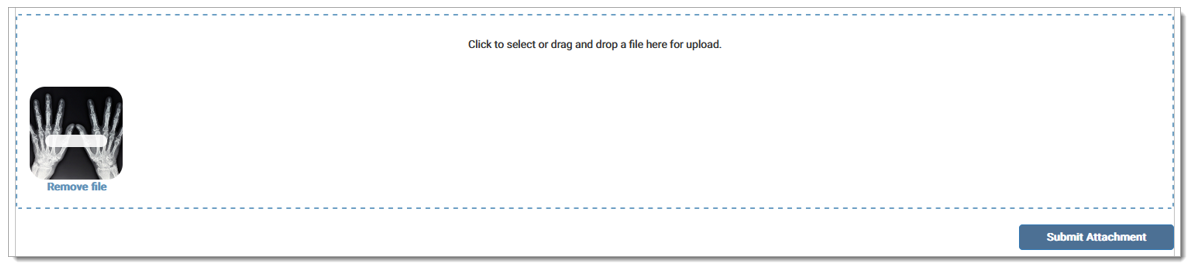
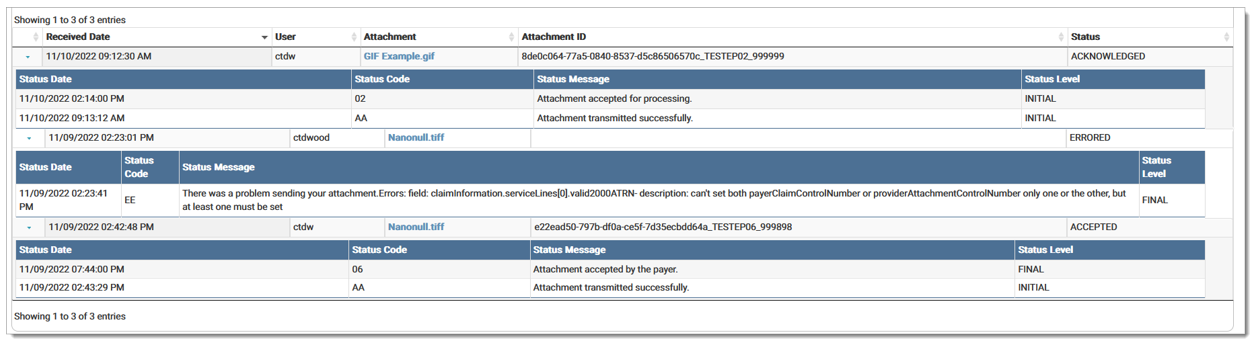
The attachment information displays in the grid. Once the file has processed, the grid displays the process date, user name of the person submitting the attachment, the attachment name, the Attachment ID, and the submission status. The grid displays current uploaded attachments, as well as any previously uploaded attachments. An error displays in the Status column if the attachment did not process correctly.

Clicking the attachment at the bottom will populate the relevant information associated with that attachment. A confirmation message displays at the top of the screen stating data loaded from an attachment #, followed by a unique number assigned to the file.
Click the arrow to expand the attachment details, which includes the Status Date, Status Code, Status Message, and Status Level.
Click the file name link in the Attachment column to view the attachment.
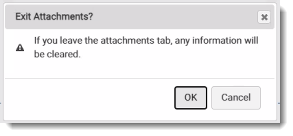
If a user attempts to navigate away from this screen, an error message displays indicating any information will be cleared.
The HOLD ADDL INFO REQUIRED status is applicable to WC/AM claims only. Claims marked with this status remain non-editable and will not be transmitted until the corresponding attachment is uploaded. Once an attachment is successfully uploaded, the claim status will change and the attachment will be placed in P2 status. It is not possible for a user to manually release or alter claims in the HOLD ADDL INFO REQUIRED status.

A record is added to the Audit Log for the activity.
eMEDIX Online | Published: 2026.06.11 | ©copyright 2026 CompuGroup Medical, Inc. – All rights reserved.