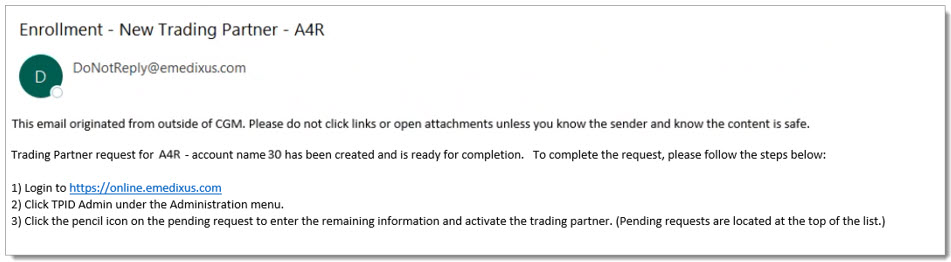
After order processing is completed by eMEDIX, an email is sent to the Contact Email for account completion. Please follow the instructions to activate the TPID. Users must follow the instructions to activate the TPID. If it is a Migration site, the instructions indicate the Legacy Clearinghouse credentials must be provided.
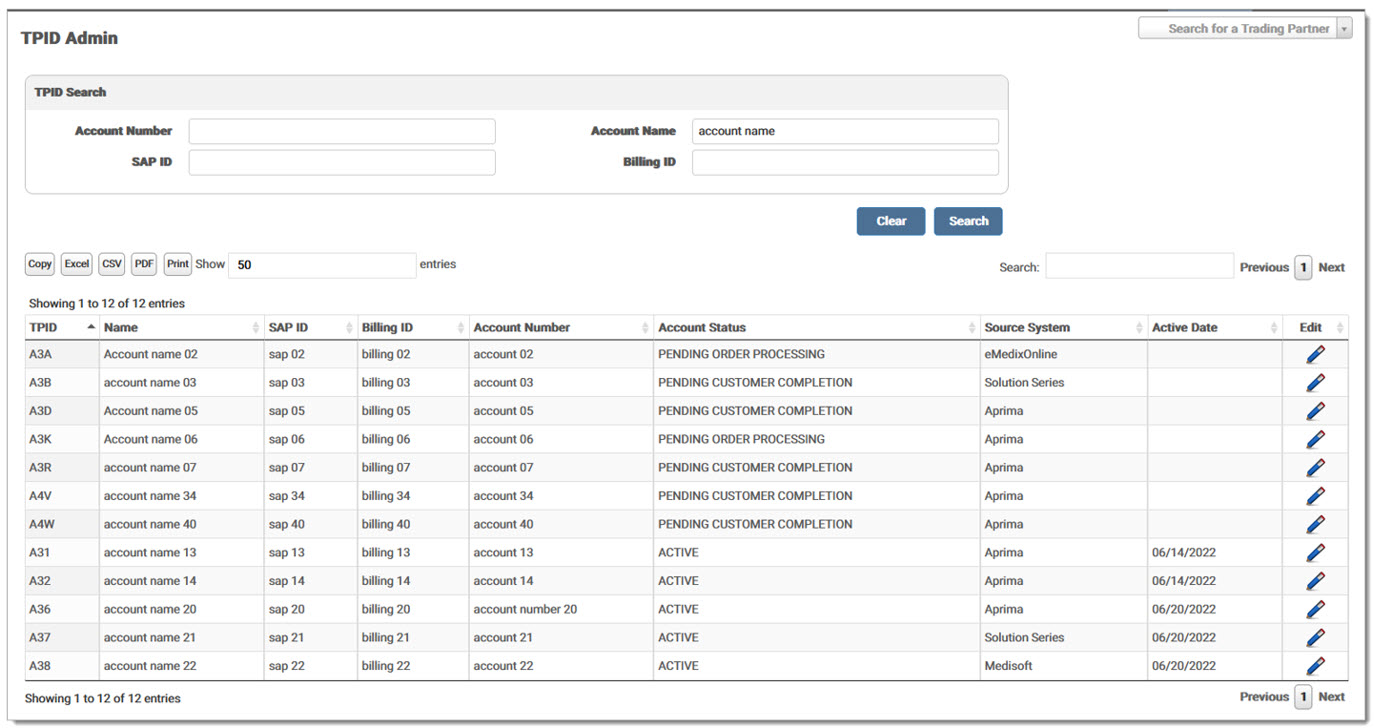
Click the pencil icon on the pending request to enter the remaining information and activate the trading partner. Pending requests are located at the top of the grid on the TPID Admin screen. ![]()
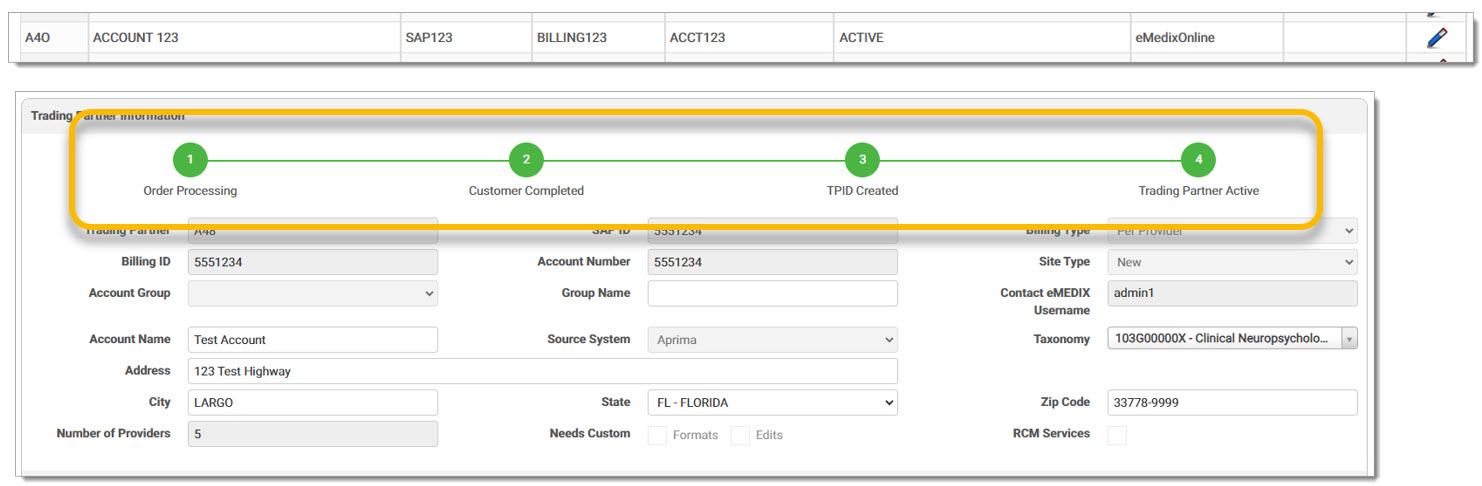
The status displays at the top of the screen and the user can view it as it moves through the processing statuses. Users must have the appropriate permissions to view the processing workflow. 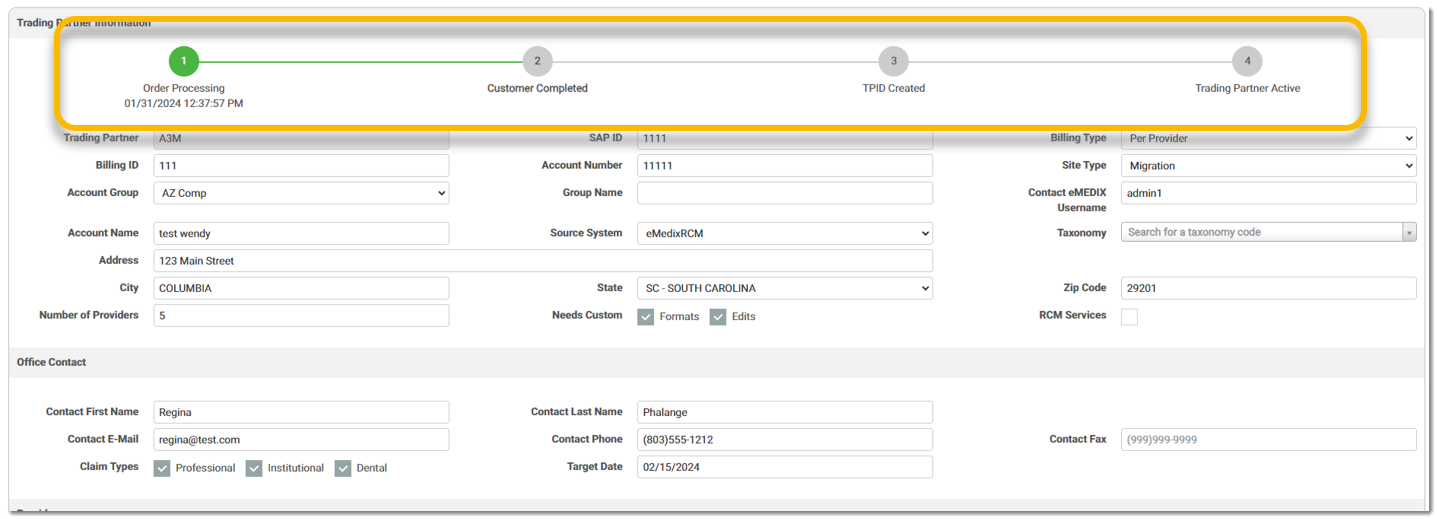
A Site Type is required. Options are New or Migration.
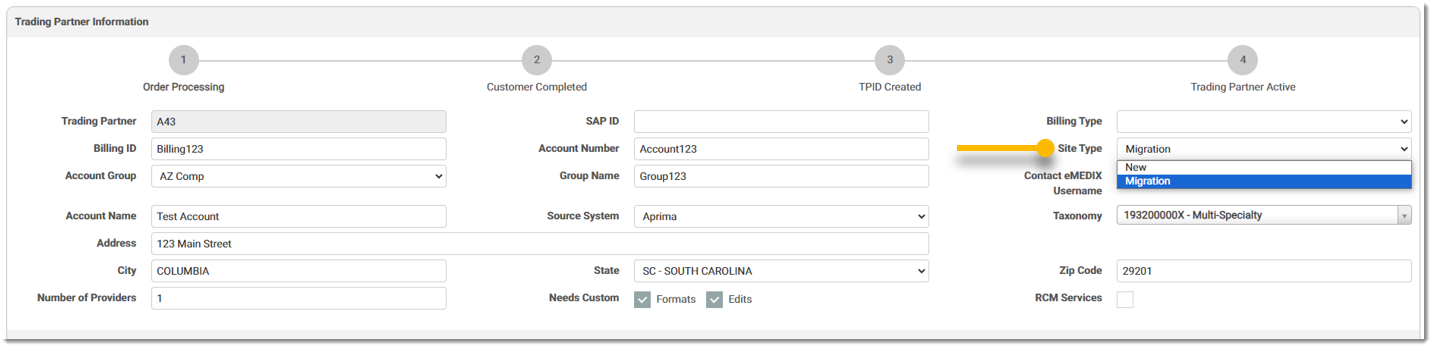
If Migration is selected, the site's Legacy Clearinghouse credentials need to be entered in the Legacy Clearinghouse Information section (which only displays for Migration sites). Once a Legacy Clearinghouse is selected from the drop-down menu, the URL is automatically populated.

Click Add Provider Group to enter the Provider Details. Enter the Tax ID and select the desired radio button to indicate whether the provider is filing as Individual or Group. Click Add NPI to display the NPI fields and enter the Provider NPI, Provider Name, and select the appropriate radio button for Individual or Group. More than one provider can be added. When filing as a group, at least one group NPI is required. The X icon allows users to delete an NPI. Click Add Provider Group to enter more than one Provider Details or click Remove Group to remove a group.
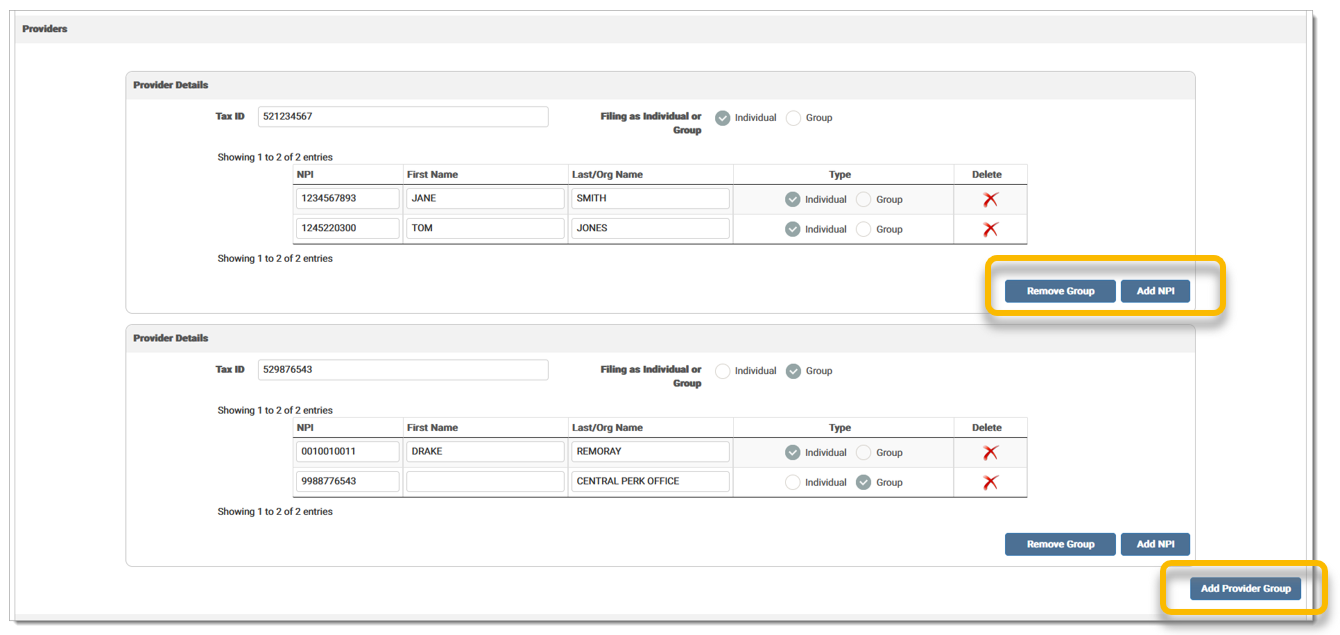
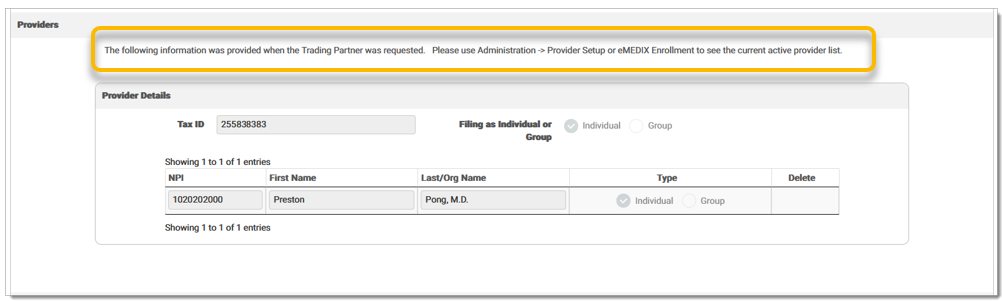
Upon saving, the providers are added to EZ Enroll appropriately. If filing as a group, the group NPIs are added (at lease one group NPI should be added when filing as a group). If filing as individual, the individual NPIs are added. The records are checked against NPPES when adding to EZ Enroll. If not available, the information we have available is added. When submitted, a message displays indicating the enrollment account (and providers) were created. A note displays in the Providers section when the Provider Details were provided when the Trading Partner was requested.
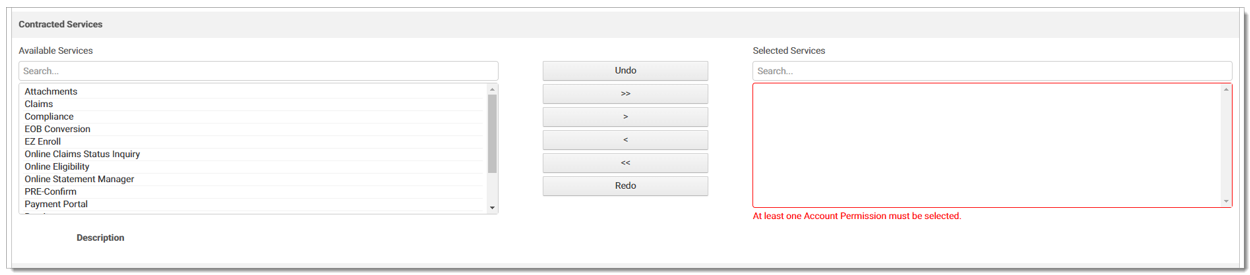
The Contracted Services section indicates the available and selected services for the new TPID. At least one service must be selected. Note: Payment Portal permission is also known as CGM Pay permission.
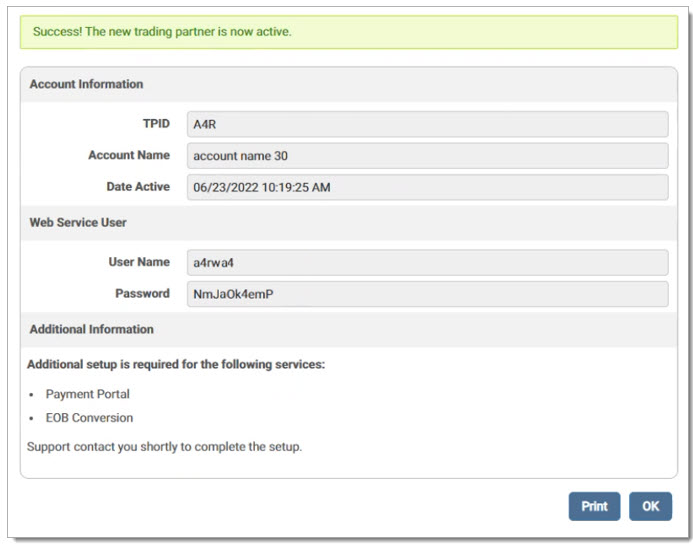
Click Submit to submit the request to eMEDIX and activate the TPID. A message displays stating the new trading partner is now active and includes the Web Service user and password. If additional setup is required for the trading partner, it is listed in the Additional Information section of the success screen. Note: If the user does not document the original Web Service password created in this step, it can be reset in the User Admin screen. If the password is changed for a Web Service user, credentials must also be updated in the user's PM system.
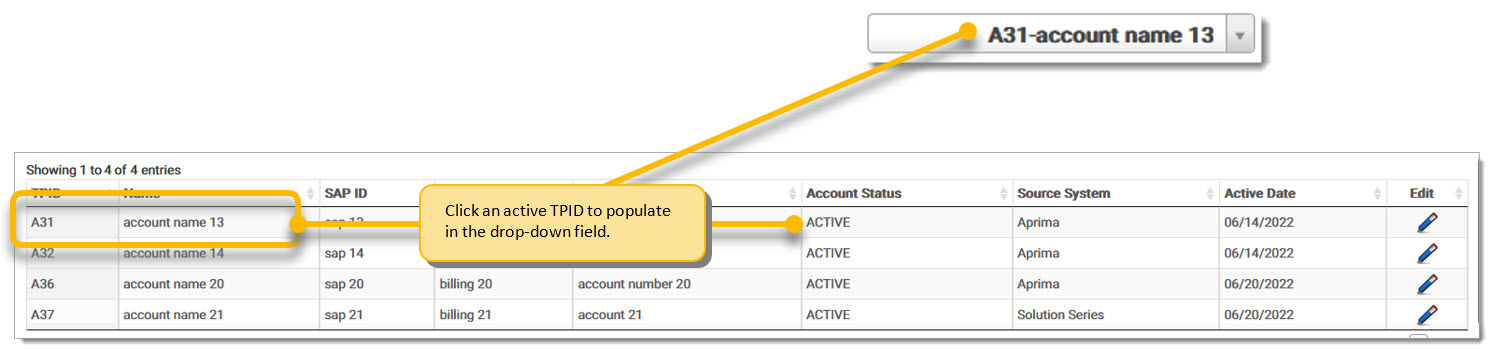
The TPID is available in the grid with an Active Account Status and the processing workflow indicates the trading partner is active. Active accounts can edit Group Name, Account Name and Address, Provider Contact Information, and Filing as Individual or Group.
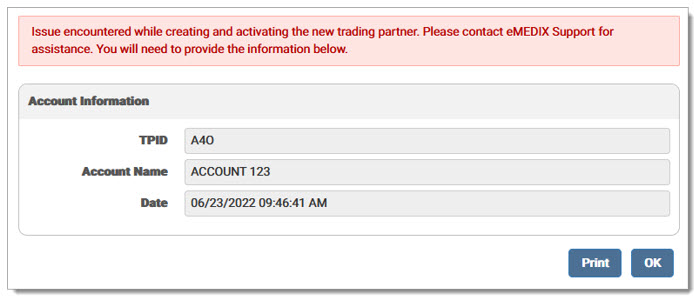
An error may occur when creating and activating the new trading partner. If the following error message displays, please contact eMEDIX Support. Users must provide Support with the Account Information on this screen.
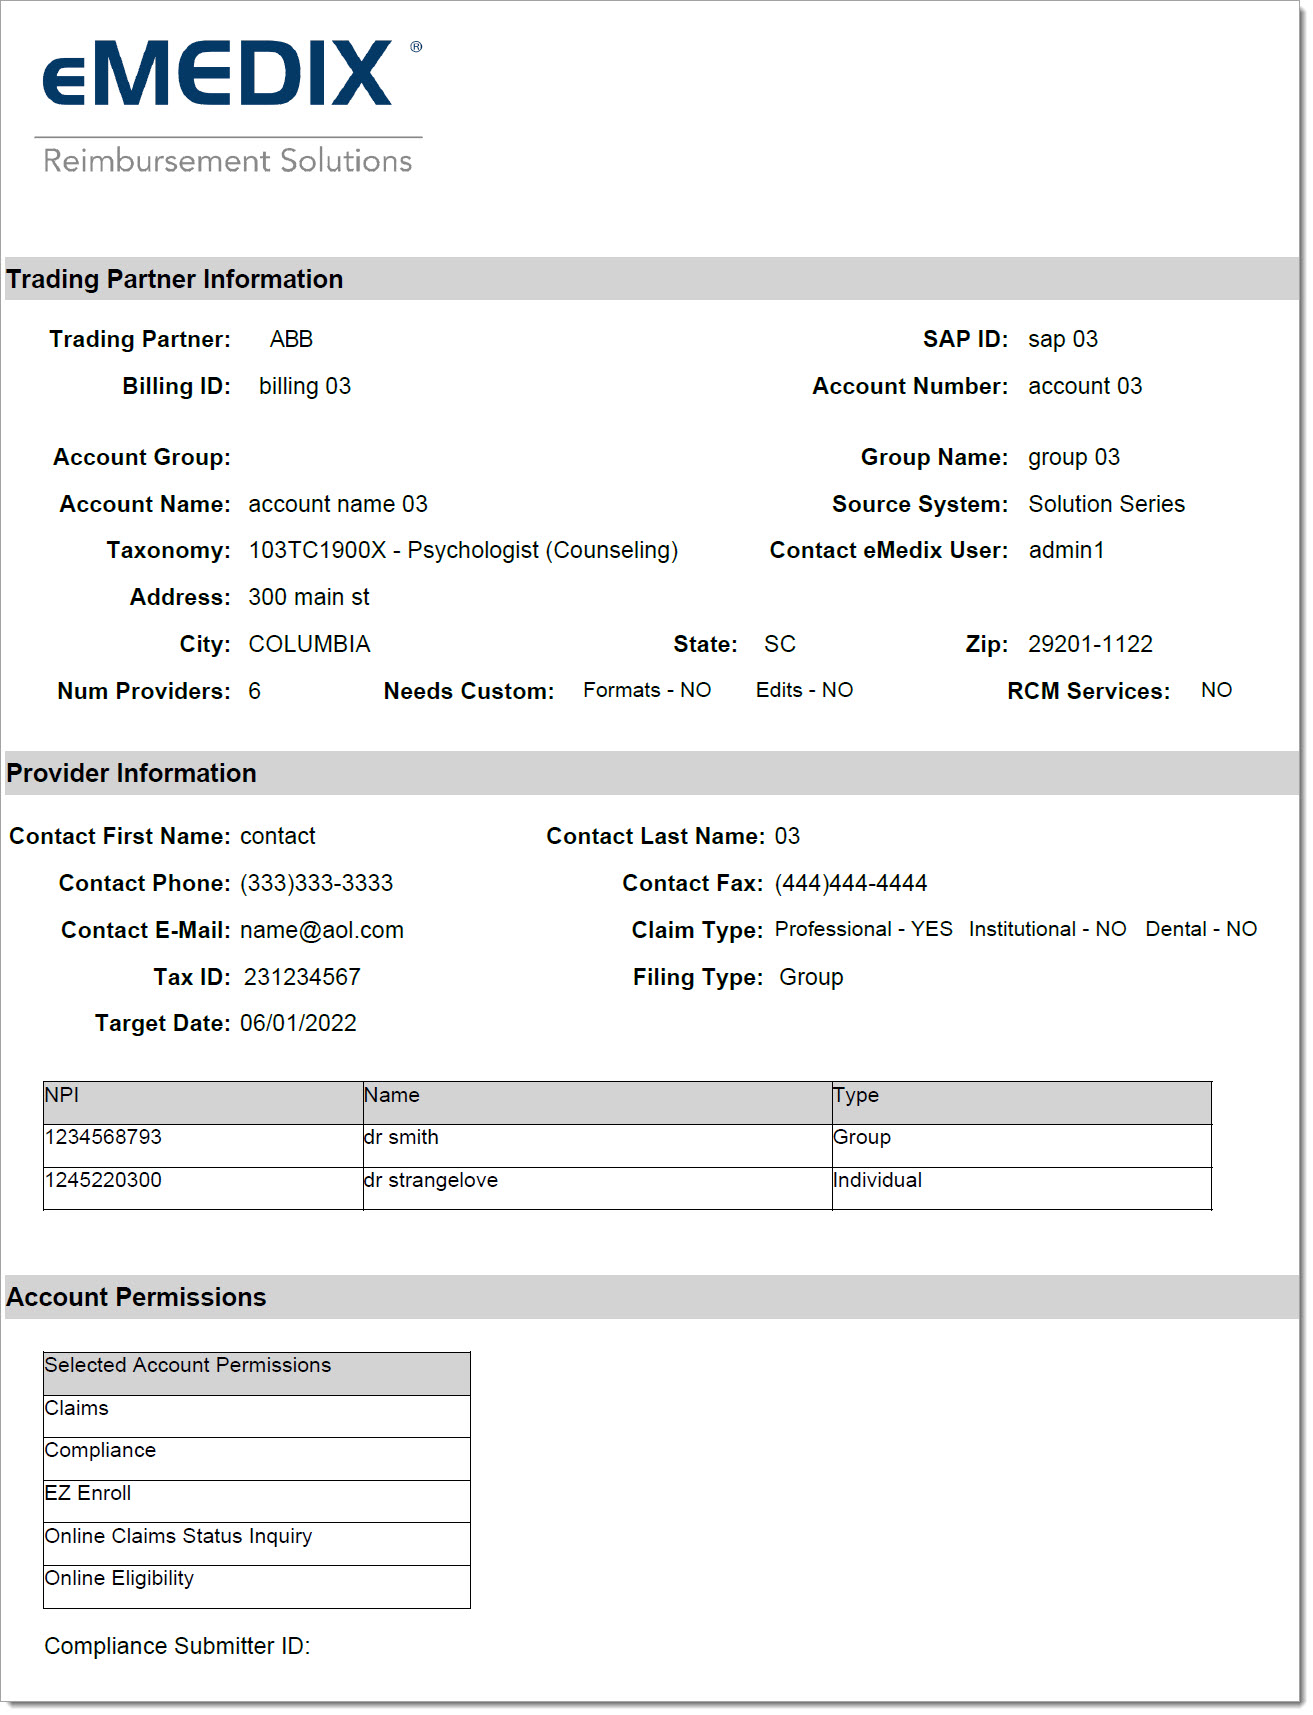
Click Export on the Trading Partner request screen to download the TPID Request as a .pdf.
A record is added to the Audit Log for the activity. Users may search for TPID Admin to view the activity report.