The Provider Setup feature allows admin users to view all providers currently registered for the logged in trading partner. Users can also add, edit, or deactivate a provider.
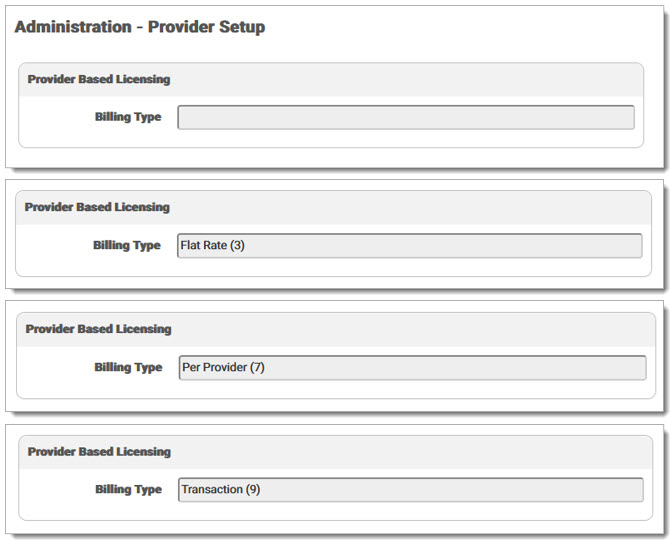
Provider Setup includes a section for Provider Based Licensing information. The Billing Type field is disabled and displays the type of billing for the user along with the provider count (Example: Per Provider (12) indicates the user is billed per provider for a maximum of 12 providers). Billing types include the following:
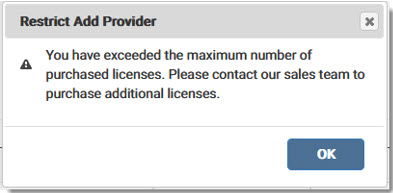
Users can add a specific number of providers in Provider Setup based on the number of purchased licenses for their TPID or group of TPIDs. Users are unable to add more providers than they have purchased. If a user attempts to add more providers than they have purchased, an error message displays stating they have exceeded the maximum number of purchased licenses and to contact eMEDIX Sales to purchase additional licenses. If a provider is deactivated in Provider Setup, that license can be used by another provider. This provider limit only applies for billing type Per Provider.
To add a provider, select Setup from the Administration drop-down menu and then select Provider:
The available provider information displays in the grid, which includes Provider ID Type, Provider, ID, Last or Org Name, First Name, and Create Date. Users can also edit or deactivate a provider from the grid.

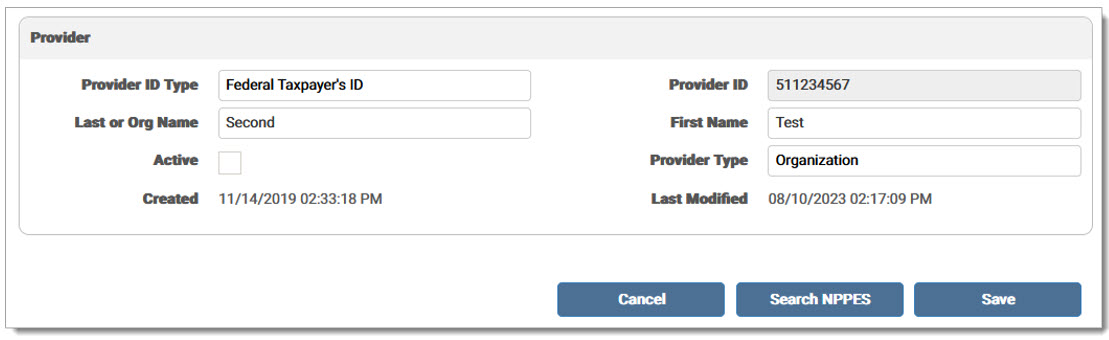
Click Add Provider Setup to add a new provider. The Provider screen displays. When adding a provider by Federal Tax ID, select that provider from the Provider ID Type drop-down menu and enter the provider information manually. Click Save.
A success message displays stating the Provider Setup saved. The provider information now displays in the grid on the Provider Setup screen.

An error message displays if the provider record already exists.

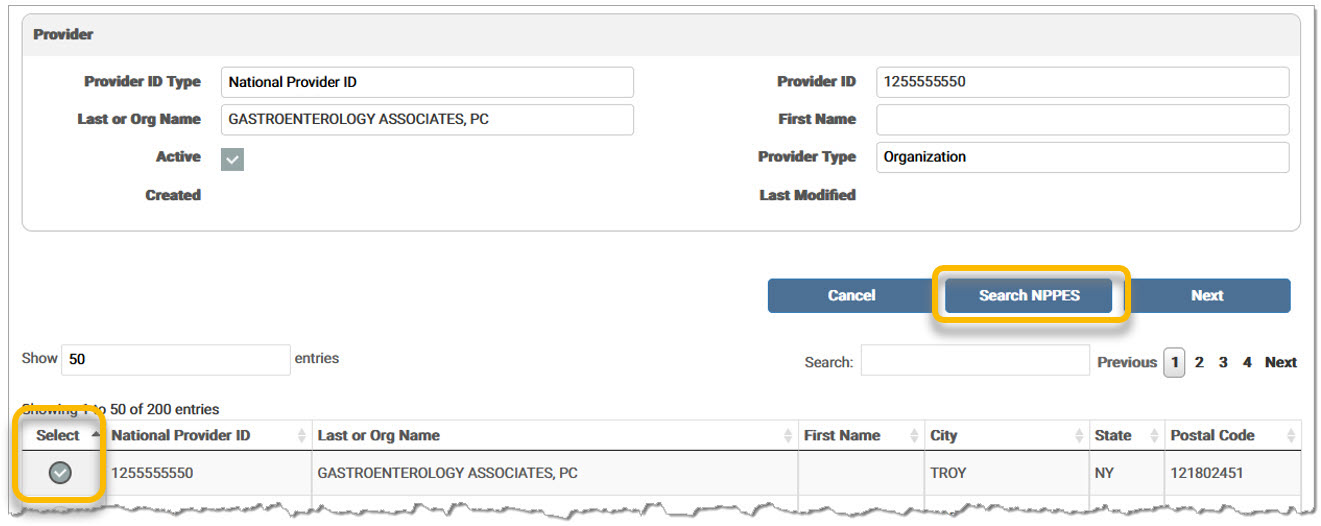
To search using NPPES, enter the known provider information manually and click Search NPPES to access the NPPES Provider Registry directly and search for a provider. National Provider ID, Last or Org Name (minimum 2 characters), or First Name (minimum 2 characters) must be populated to search NPPES. The available data displays in the grid. Mark the Select radio button next to the desired provider and click Next.
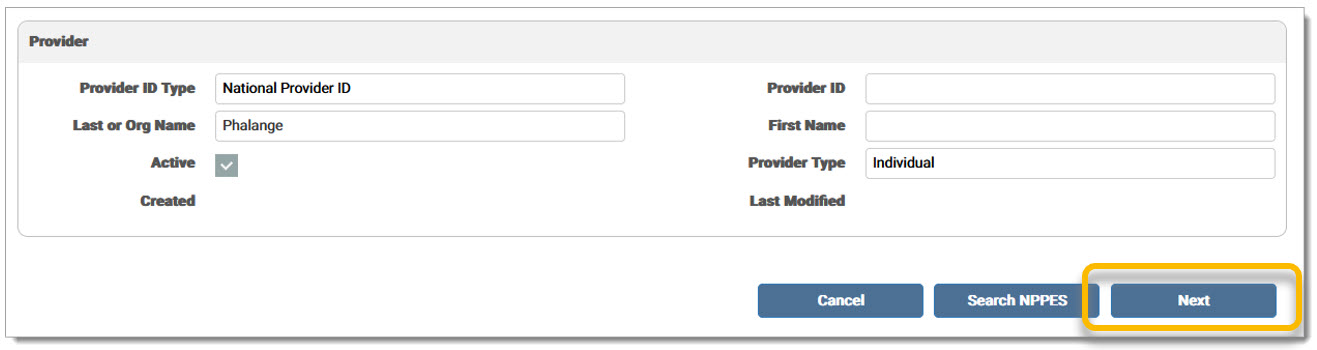
If the current TPID is set up for EZ Enroll and selects NPI as the Provider ID Type, a Next button displays in place of the Save button on the Add Provider screen. Enter the provider information manually or click Search NPPES to access the NPPES Provider Registry directly and search for a provider. Click Next to add the provider to eMEDIX Enrollment.
Mark the Update in Enrollment check box to add/update the provider. If applicable, include the Tax ID and/or Location in the optional fields. Click Save. Note: This should only be done if the intention is to enroll this NPI with payers.
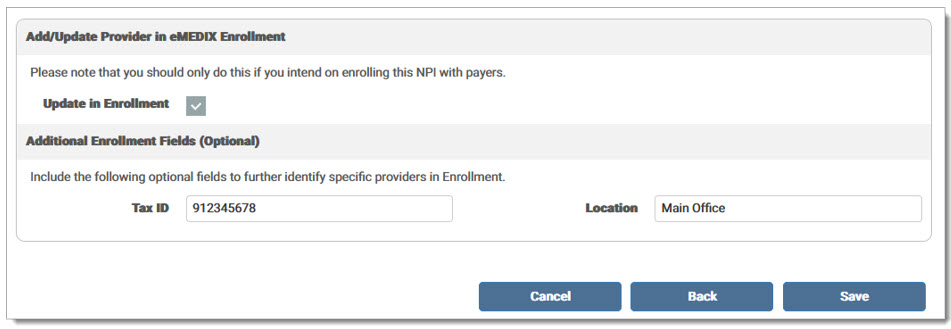
A message displays indicating the provider was successfully updated in eMEDIX Enrollment.

For Per Provider Billing Types - If the user attempts to add more providers than they have purchased, an error message displays stating they have exceeded the maximum number of purchased licenses and to contact eMEDIX Sales to purchase additional licenses. If a provider is deactivated in Provider Setup, that license can be used by another provider.
If a provider has enhanced remit routing, the routing type displays in the Enhanced Routing grid on the search screen. Enhanced Routing enables a more detailed remit routing at the CLP level. Note: Please contact eMEDIX Support to set up Enhanced Routing.

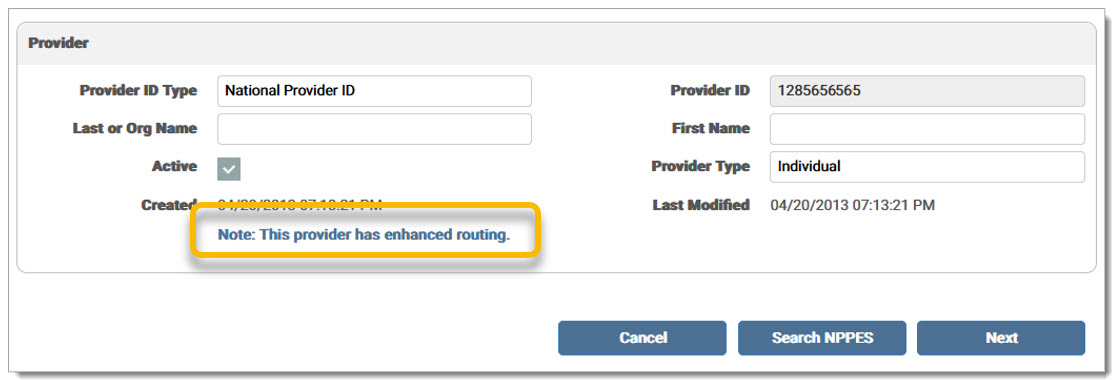
Click Edit to view the Provider information. A note displays under the Created timestamp indicating the provider has enhanced routing.
A record is added to the Audit Log for the activity.
To edit a provider:
Click the pencil icon in the Edit column for the desired provider.

The Provider screen displays and the Provider ID field is disabled. Make any necessary changes and click Save. The Last modified date indicates the last time the provider record was modified and updates once the record is saved.
A success message displays stating the Provider Setup saved. The provider information now displays in the grid on the Provider Setup screen. 
A record is added to the Audit Log for the activity.
To deactivate/activate a provider:
Click the X icon in the Deactivate column for the desired provider to deactivate it.

The provider is now inactive; the Deactivate column displays the date and time the account was deactivated.

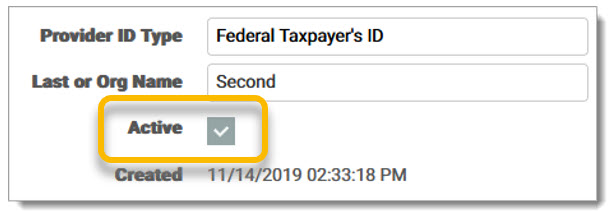
To activate the provider, click the Edit icon. The Provider screen displays and the Active check box is unmarked.
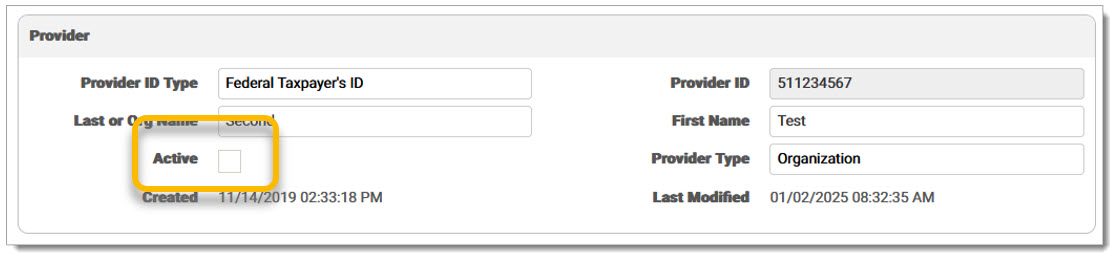
Mark the Active check box and click Save.
A success message displays stating the Provider Setup saved. The X icon displays in the Deactivate column, indicating the provider is active. 
A record is added to the Audit Log for the activity.